This is the last part of the building of the T-55. Just in time for the MiniArt T-55A with full interior to come out, but to be honest I don’t really mind; I’ve been collecting parts for this build for a long time -it does have a sentimental value for me…
Previous entries:
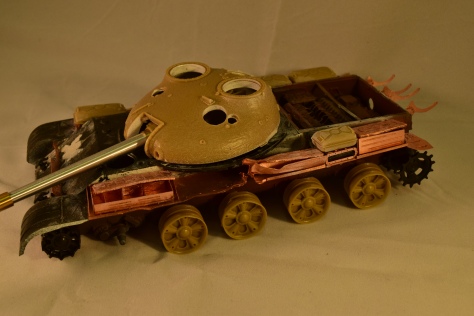
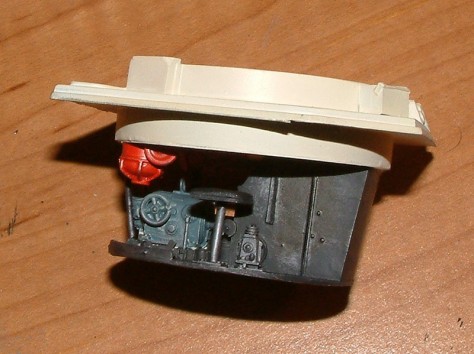
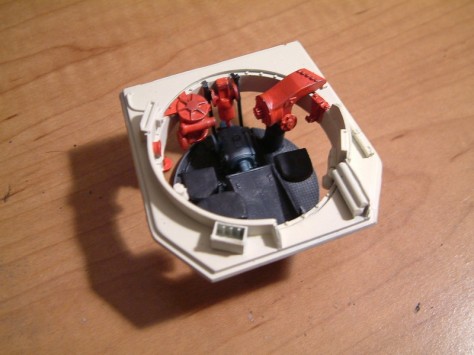
As with all builds, I’ve learned a lot from my mistakes; and I finally know what those things sticking out of the back of the turret are. Which is nice.
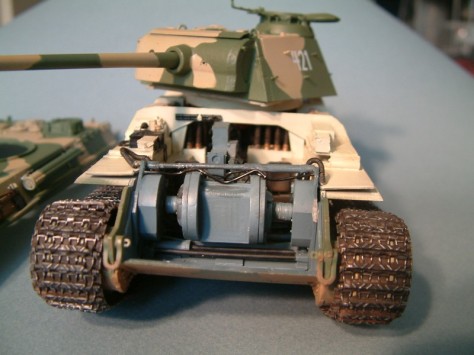
The last time we left off the tank was mostly finished; the filters I wanted to apply were on, pin washes finished, and everything was ready for the weathering. Before I started I added some decals, though. The markings are fictional; I’ve printed out some Hungarian markings and used a number from the MiniArt T-44 set; the only thing that is not fictional about the tank is that the AM version was in service of the Hungarian armed forces. I know purists will be horrified, but I just did not have the energy to do hours of research to find one particular tank to model. (Ironically I have an amazing book on the history of the Hungarian Armoured Forces – two thousand miles from here…)
I also needed to paint a couple of details, such as the canvas cover for the gun mantlet, but mostly the tank was done.
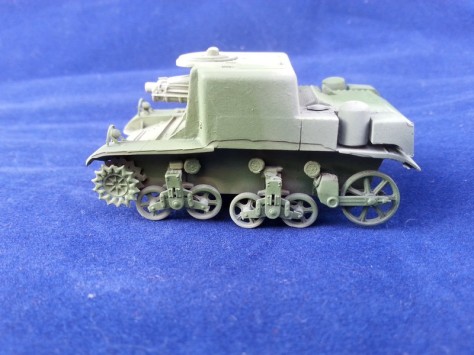
The next step was to apply dust. Dust and mud are the two things I’m not really good with, so this part I put off as long as I could. I settled for AK’s dust products, and mixed my own mud.


AK’s dust comes as a suspension; when you apply it, it goes on thick, and the results are not very pleasing. At least this is what I thought at first. As with everything I realized the secret is not adding stuff to the model, but removing it after. I diluted some of the mixture in white spirit, dabbed it onto the tank, waited some time, and then using a wet brush I removed most of the dust, spreading it around, adjusting it. The key is to be patient: you can always repeat the procedure (in fact, you should), if there’s not enough added. Adding less is always preferable to adding more.
One the dust was dry, I went on mudding up the lower chassis.
What I failed to realize for a long time is that it’s not enough to buy a product called “mud”, and them smear it onto the tank; just as you can’t just cover a tank with a paint labelled “rust”, and expect realistic results. Obviously the results will be sub-optimal; there are really no shortcuts in mud. (I feel this sentence carries some deeper, more profound meaning.) Even if you buy custom-made products you still have to learn how to apply them, and that’s that. And since you need to learn it anyhow, you might as well save some money and make your own mud.
The first layer was simple pigments suspended with water. I dabbed it on, then after it was mostly dry, removed some using a brush. A day later the procedure was repeated with a different color. The key here is layers; just like Shrek, mud has layers, too. Old mud tends to be dryer and lighter; newer deposits tend to be thicker, darker and placed lower. I dabbed the pigment-water mixture all over the lower chassis, the side-skirts, even on the top of the mudguards (in a much more diluted form).
I also splattered some using a loaded brush and a toothpick onto the side-skirts; any splatters that were out of place (on the side of the turret, for example) was removed with a wet brush using downward motions, leaving a very faint streak behind. I’ve also used Vallejo’s mud product on the side-skirts; it produces quite dark splatters which are quite different from how it looks like on the photo on the bottle.


A day or two later I decided to try something I’ve never done: I made thick mud. I used Mig’s Neutral Wash as a base. I got this as part of a set, and frankly I can’t really find any use for it; it’s too grey to be a “normal” wash. If you know how to use it, please let me know.
It did serve as a good medium, though. I mixed in a lot of brown pigments of different shades, some sand and some static grass, and then offering my soul to the gods of model building, I proceeded to apply the mixture to the lower chassis.
The method was the same application/removal as before; with a brush dampened with white spirit I adjusted the amount of mud on the wheels and chassis. I also added some on the mudguards (and sprinkled some on). The results are actually quite spectacular; I did not dare to hope for such a nice effect.
Once the mud dried (I gave it a week), I used my graphite pencil to give some metallic shine to the edges. I used some black pigments on the side-skirts directly next to the exhaust, and applied some oil stains. Again; I just used AK’s and Vallejo’s products slightly diluted. I made bigger, more dilute patches, and once these dried, added smaller patches on top of them with oil products slightly less diluted.
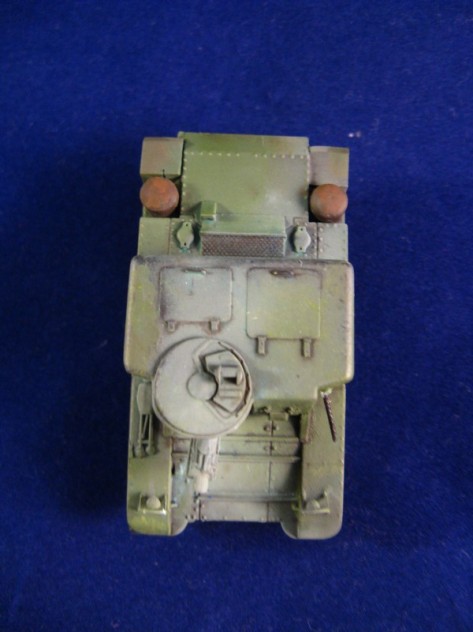
The external fuel tanks on the back were given some diesel stains. (I admit I did not scratch build the piping that would allow the tank to use these external tanks. I did make the pipes for the smaller external tanks if it’s any consolidation, though.)
That’s pretty much it. I finally have a T-55AM with full(ish) interior. It was a pretty long (and expensive) undertaking. To be honest I can’t recommend anyone doing the same- after all, there will be an all-plastic alternative available by MiniArt soon, with a much better detail than the CMK set. (A subject of a later set of posts…)


 I’ve known about Milicast since, well, forever. (Or at least as far as 2005.) I remember finding their website, and looking at the wide selection of interesting models thinking I’d never be able to afford the prices and the shipping to the US.