MiniArt has issued a civilian version of a car that they already had in their catalogue in military service: the Mercedes-Benz W30 Typ 170 V Saloon. (The V stands for “Vorn” -indicating the engine is in the front of the car. They had a rear-engined variant as well, which carried the letter H.) The model does not actually have the brand name in the title for copyright reasons, but we do get the Mercedes symbol for the front of the car, so it’s not exactly surprising what make this vehicle is.
This cabrio was a widely used passenger car during the ‘30s, even into the ‘60s. It was one of the top selling model of the company before the war, an affordable, more luxurious “people’s car”, than the VW Beetle. It was also one of the most produced model as well (it’s difficult to get accurate numbers but around a hundred thousand cars were produced during the full production run of the vehicle) in dozens of different configurations. It was used by the German armed forces as well – the subject of MiniArt’s previous issue of this vehicle. The production went on from 1936 to 1953, with some pause during the later phase of the war when the factories producing the parts were bombed.
There are several good references online: Mercedes-Benz’s own website, some interesting information/photos on pre-war Mercedes models, some historical notes on the pre-war Mercedes passenger cars.
The model is a far cry from the monstrous 1000+ part kits MiniArt has been issuing lately (this is not a complaint, don’t get me wrong… I love the full interior tanks), so building should not take long. One thing you really should do is to plan ahead, as the usual (for me, as an armor modeller, at least) sequence of building sub-assemblies, assembling, painting sequence is not going to work. In some cases it makes sense to deviate from the building sequence as well. I will mention the pitfalls and problems I ran into and the mistakes I made as well; maybe it’ll help others planning the build.
One example of me not planning ahead was the wheels: the tires and the wheel hub assemblies come separate, so if -unlike me- you paint these before assembling them, you will have an easier time.
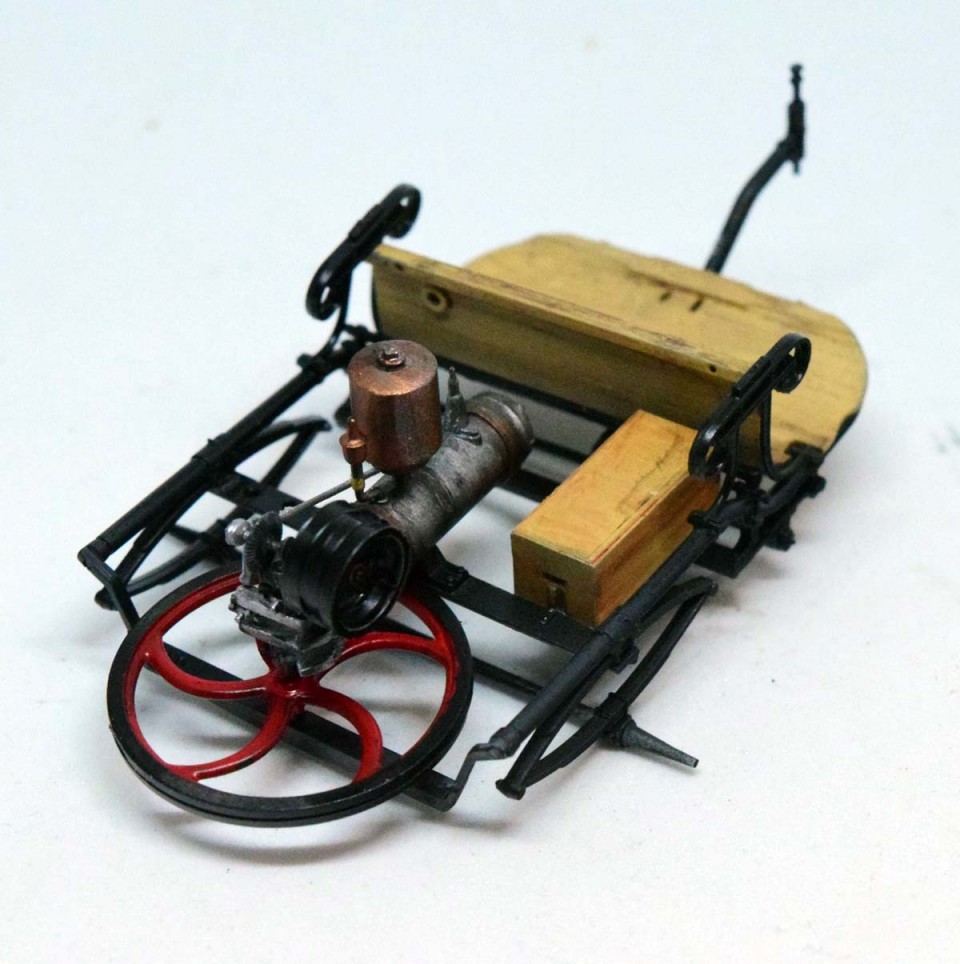
The building starts with the engine and the chassis; the details are pretty delicate and well done; the model fits together very well. (It’s a pretty interesting comparison to put the 1/35 V2 engine of the T-54 next to the 1.7l gasoline engine of the Mercedes…)
When putting the exhaust system together I would suggest gluing the PE holders (PE6, PE9) onto the chassis, instead onto the muffler, as the instructions say- it will be much easier to align them together.
The instructions show you how to make the brake cables: you get a large-scale diagram to see how they should look, and you get an in-scale diagram to use it as a template; a pretty good solution.
The suspension is very delicate, and features the characteristic plastic springs I find so amazing. Be very careful cleaning them up, though as they break easily.
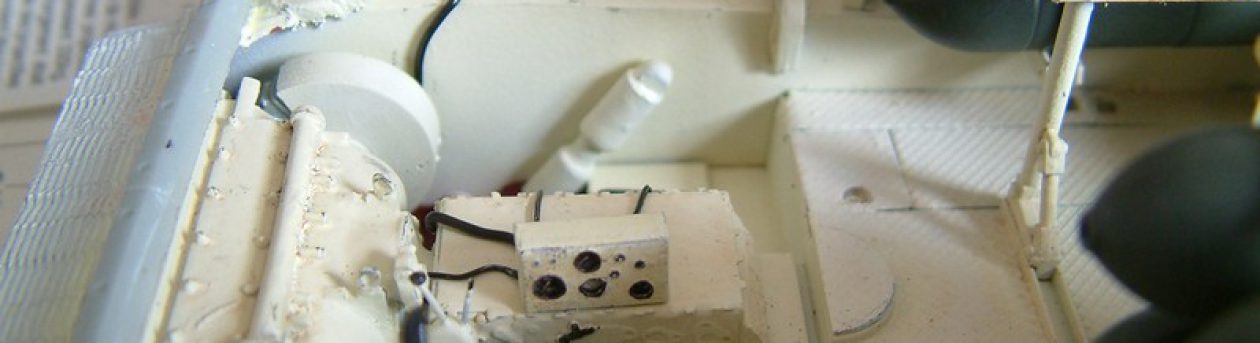
The interior is pretty straightforward. The instrument panel has some tiny PE assemblies that are not easy to do, and my main issue was that there were no decals provided for the instrument faces. There are raised details, but they whole face is sunk into the instrument panel; it’s not easy to drybrush because of that. (It’s not very visible once installed, so it’s not really an important issue.)
One word of suggestion: when gluing the PE rear-view mirror onto the windscreen, use white glue instead of superglue; it will make sure that the superglue does not fog the transparent part.
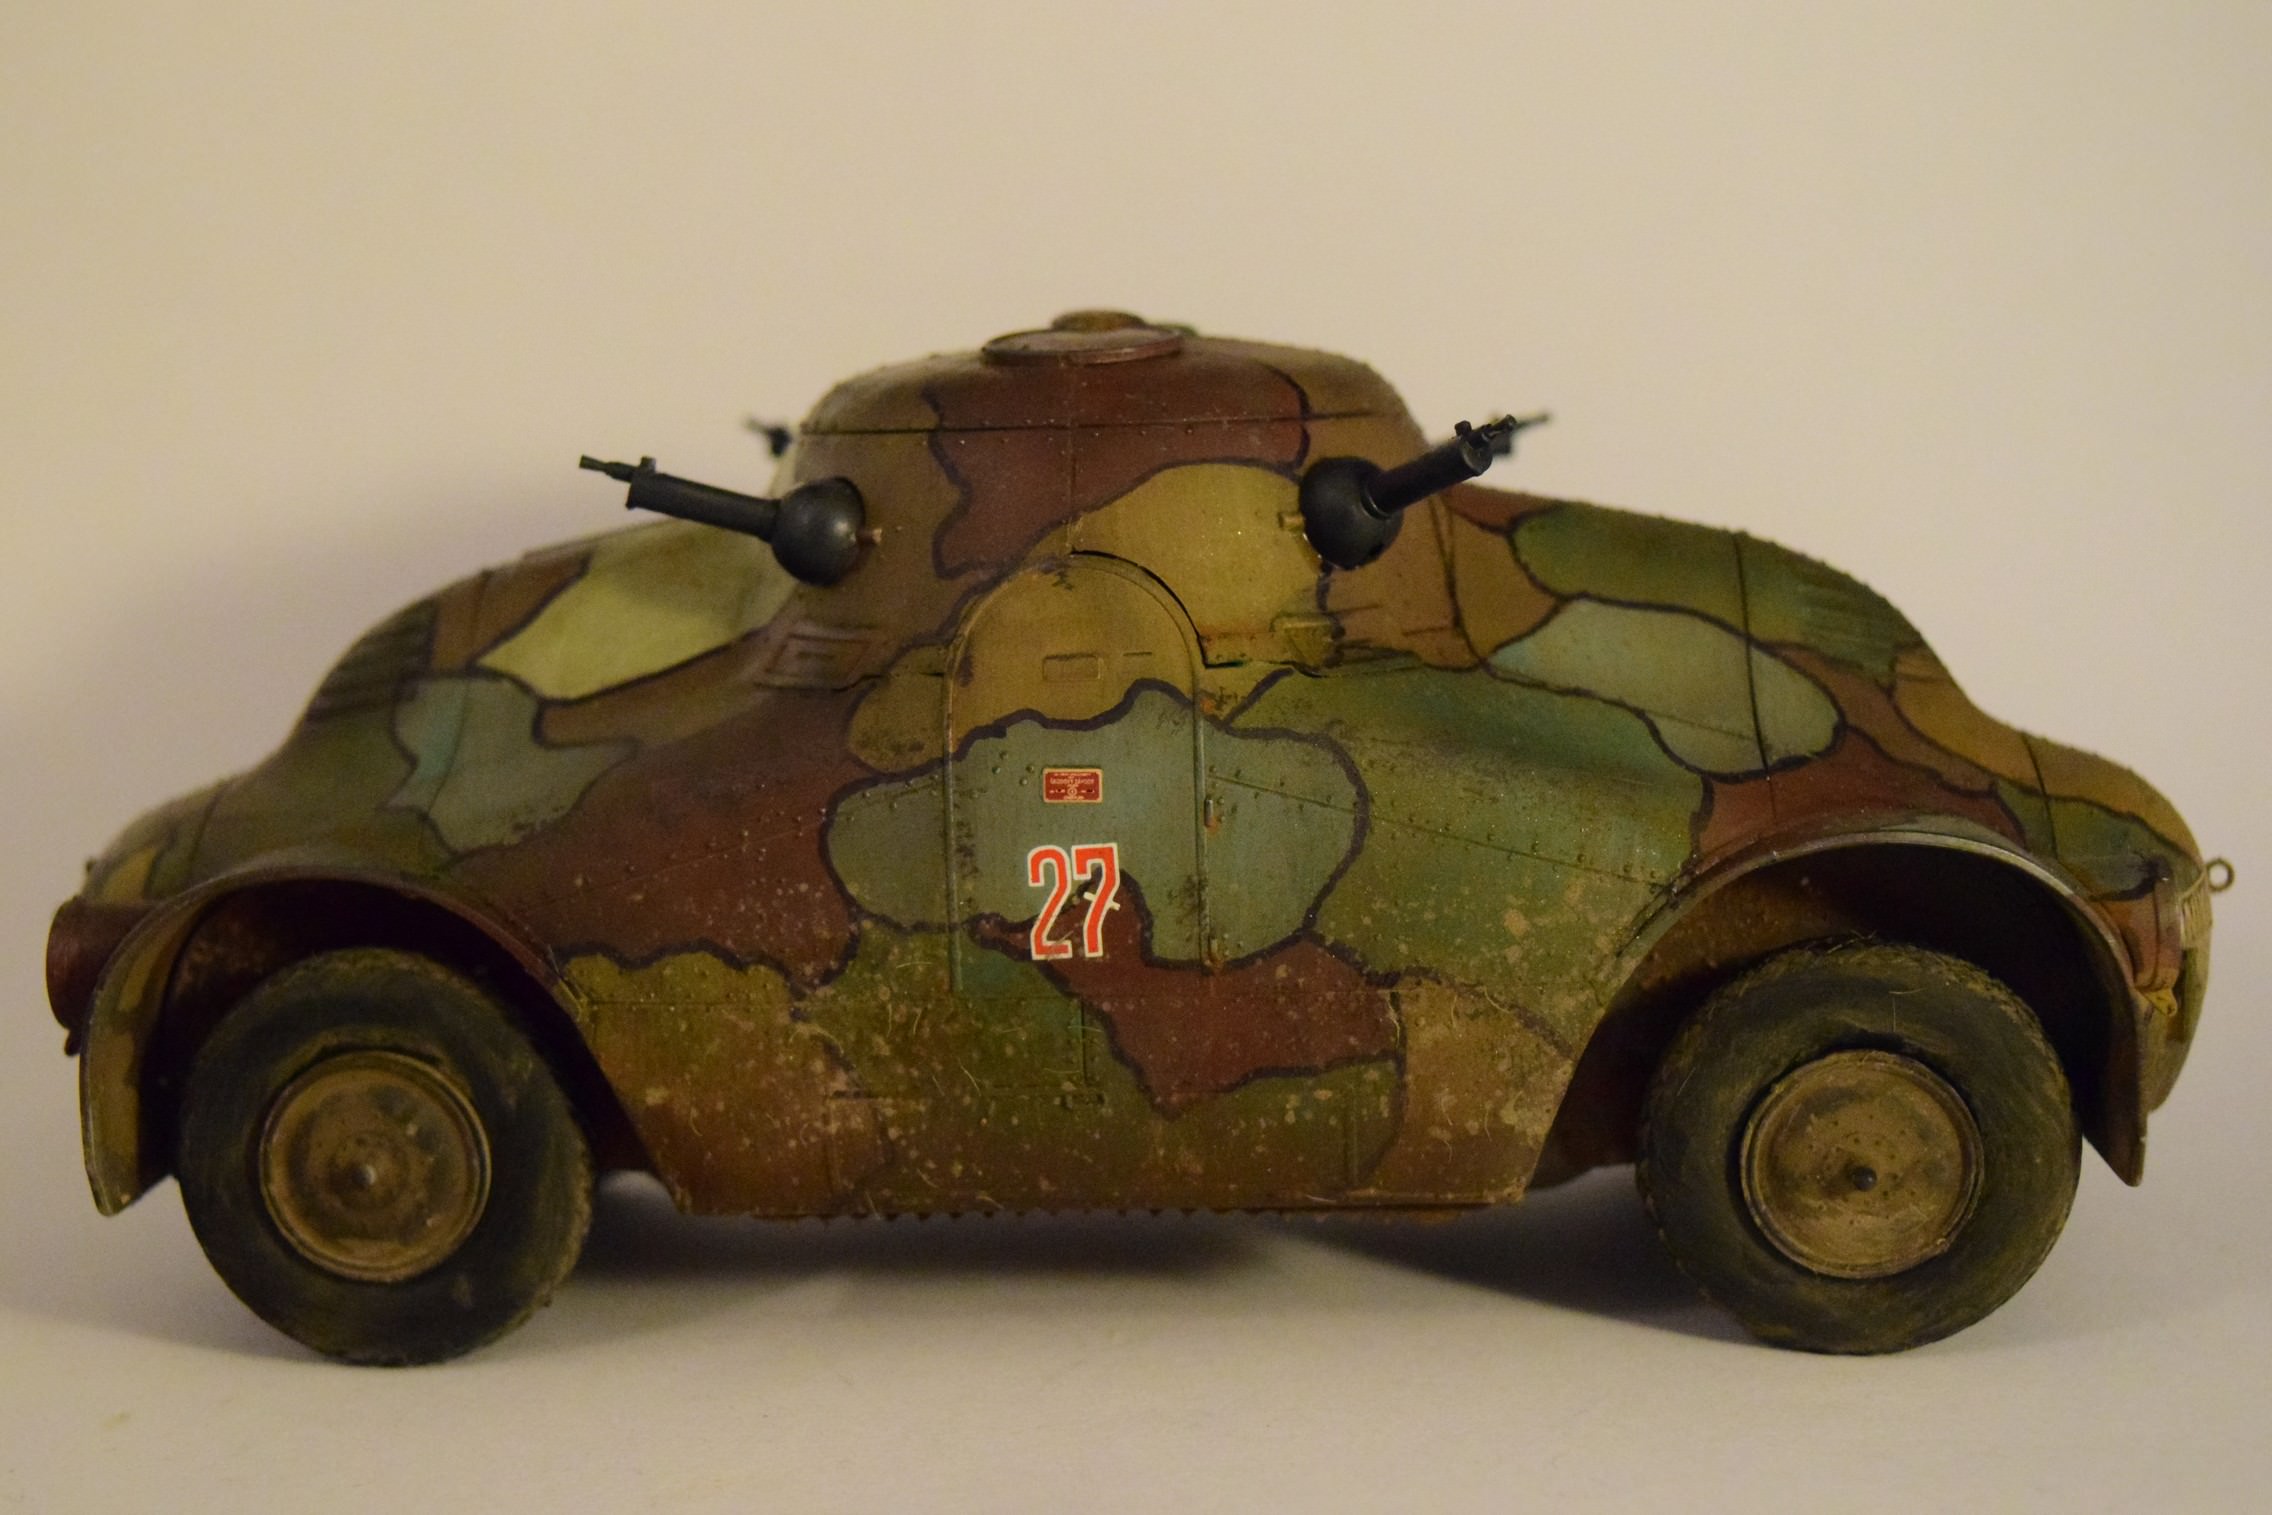
The painting of the body is also something you should do before installing it onto the chassis, since it makes masking and handling much easier; however it means you need to check what needs to be added before you do the painting. (I have to admit I found it challenging to replicate the highly polished, shiny car body; I’m more used to painting matte armor; not to mention my airbrush started dying on me and sputtered paint at times.) Even the doors need to be painted before assembly as it is easier to deal with them with no clear parts installed.
Airbrush problems aside, the first step was to decide on the paint scheme, and paint the body and the sections of the hood. Masking provided some challenge, as the masking tape (which was a dedicated modelling tape) I used peeled away some flakes of the underlying base color… Not the luckiest build I have to admit.
Once I sprayed several light layers of paint and removed the masks, I used a brush to touch up on the problematic areas, and then covered the model with Vallejo’s varnish for metallic paints (it’s very shiny) in several layers. I used a watchmaker’s polishing paste to polish up the paint.
I elected to use the extra luggage compartment fitted onto the back of the car; one thing I noticed is that the locating grooves for the holding pegs are not very well marked on the base of the holding frame; before gluing make sure you know where they are supposed to be going.
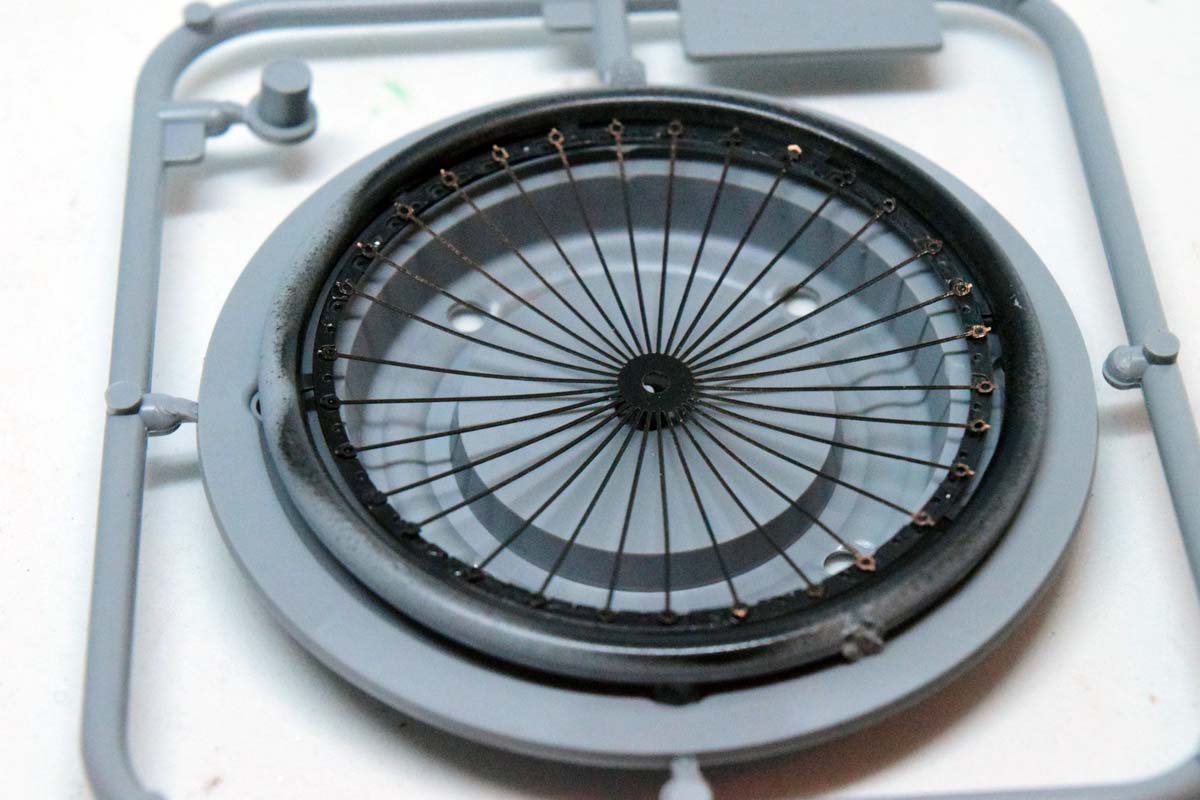
The front grill is made out of a very fine PE mesh; again, it’s my issue, but even with Vallejo’s chrome it was difficult to paint it without clogging some of it up with the paint. (The metallic paint is extremely fine pigmented.)
The grill/radiator assembly (essentially the front of the car) and the body of the car forms a frame onto which the hood and side panels are glued. The fit of the radiator is quite flimsy; I think this is my only real criticism of the kit. Since the fit is not exactly robust, the panels covering the engine compartments will need to be fitted carefully.
The very last step should be fitting the Mercedes sign on the front of the car; a kind of coronation of the build. Since I’m not very keen on figures, the female figure (which, by the way is quite well detailed) found her way into my spares box.
All in all, it’s a really pleasant, relatively easy (well, the tiny PE was a bit challenging…) build; the car looks great, and there’s a lot of great paint schemes to choose from. If you need an interwar civilian car in your diorama, look no further. Because the chassis, suspension and the engine is quite detailed, it’s also suitable for creating wrecks, too.
.JPG)


