First part was about the build, and a quick review; now we start the painting…
As usual, priming and preshading was done with Vallejo’s primer.
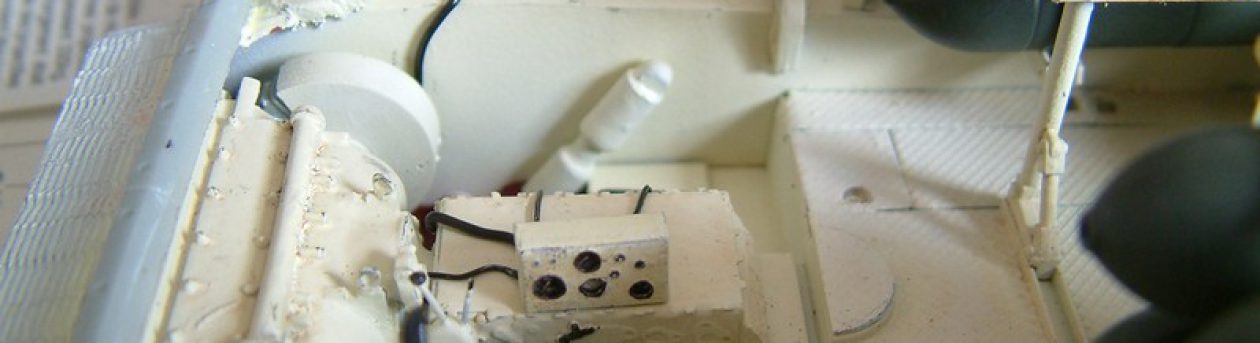
Since the lockdown seriously affected my ability to go to some hobby shop, after some deliberation I used Hannant’s ivory color as a base. It is brownish, rather than ivory, so it is not very good for interiors, but it looks very similar to the brown color I saw on photos of IDF vehicles.


Once the paint dried, I used black pinwashes to bring out the detail. I did that in several sessions, waiting a day, removing the excess with a damp brush, reapplying the wash… I also used this as an opportunity to create streaks on the armored side-skirts. Once I decided it was enough, I went on creating paint chips. I know it is a contentious issue, but I personally like the look, and despite of not being historically accurate and realistic, it does lend a realistic look to the model. Go figure. The chipping on the barrel did turn out to be a bit on the overdone side; I will have to do something about it.


First was to do some sponge chipping on the edges, larger surfaces. Then I went on to work on the muffler covers. Now, these metal parts were heavily corroded as they were subject of both heat and cold, so they are realistic with such a heavy application of rust. I went on using AK’s Rust Effect set to paint different hues of rust on the thin metal over the mufflers -using both a brush and a sponge. Once that was done, I used a rust wash as a filter to unify the colors, and modify the base color.
I also painted the details (tools, roadwheel rims, etc), and applied a thin spray of middle stone by Gunze on the lower parts as a first layer of dust. From then on I used Vallejo dustwashes, pigments, tamiya’s “make-up set”, and washable dust paint. It looks a bit overdone on the photos, but by eye it actually looks a-OK.
I shall be practicing making dust on this model; keep tuned in.
I took photos from two settings: one using a small, cheap lightbox I ordered on Aliexpress, and use for smaller models (it has a strip of LEDs on the top), and the yellowish-looking ones at the end were taken using a “proper” lightbox with diffused light.
While the first box is easy to set up, it is not that good for proper “finished” photos. It is great for detail and WIP shots, the diffused light (obviously) is better suited for photographing the finished article.

Great work. It is funny how unrealistic techniques can ‘sell’ the model to the eye more isn’t it?
Cheers,
Pete.
LikeLike
You mean the non-realistic rusting and whatnot? I guess this is the great paradox of weathering… (And a source of many of futile and pointless online debates :D)
LikeLike