
Great blog building the same kit with a similar philosophy.
I bought both Takom and Rye Field models, and decided to build them side-by-side. This is the Rye Field Models Panther. The Takom build is running parallel. If you want to see the corresponding parts, please see this link. (I probably will do a side-by-side photo album once I’m done building.)
Since both kits are complex, and I also have to balance my newborn, my job and my sanity, these builds will take a while, so be patient, please.
(I also have several, smaller projects on the go, so I do not lose my patience. These models are demanding.) I’ll try to be less verbose in the review, and even though I might come off as overly critical at times, I have to say this is an incredible model; please read my remarks with this in mind.
The main gun
The model starts with the assembly of the gun, so this is where I started as well. Very detailed, but not very demanding. The recoil mechanism is interesting, but completely unnecessary… this is a model and not a toy, after all.
What I did not like was that the gun breach is made out of two halves, and the seamline needed to be filled and sanded in the middle.
The gun mantlet has some interesting interior detail nobody will see once I install it – this is probably useful for someone who wants to depict the tank during assembly or maintenance.


Turret interior
Turret basket, and other interior details… everything is very detailed, lots of individual parts -and some weird design decisions, like the turret turning mechanism (first photo). There is a prominent seam line where the two halves meet -the parts could have been designed to hide this line. You also will need to glue three tiny bolts on this surface. (Takom did it a bit differently -and with the bolts moulded on, without the seamline.)
The turret basket looks great and detailed. You will need to form the wiring as well, based on a template at step 12 (which is not 1:1 but you get the dimensions in mm. Be warned: the template shows the same part from two angles -front and top-, and not two different parts… it confused me for a while.) There is even some sort of cylinder in the shell case storage, which will be hidden. Not sure what the point is.
Assembly is ongoing. Some small plastic, PE and wire details are missing.
It will be interesting, as I will have to paint everything before mating it to the rest of the turret; however, a lot of the details will need to be added after it is assembled. Planning is a real headache with this kit.


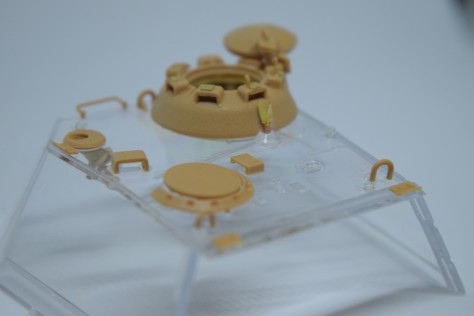
Transparent parts
The turret is transparent. I was thinking long and hard how to display the model, because painting and weathering each individual non-transparent parts separately seemed a bit too extreme, and probably would look a bit silly. What I decided upon is to mask out areas which will remain transparent with masking fluid, and paint the rest. Let’s hope it works.


The cupola has a nice, cast iron texture. I left the transparent periscopes off until the very last step, as all the painting will have to be done before installing them. All the hooks will be attached to the sides- once I can decide which parts to paint, and which parts to leave transparent. Great thing with the hooks: they are attached to the sprues from their “feet”, so cleaning them is easier. (Lots of kits have them attached on a single point on their top, which is annoying.)
Well, so far this is it. This model is amazing, for sure, but it is definitely going to be a difficult, demanding build.

Looking good so far. BEing able to see into the detailed interior is an interesting idea.
How are you stopping the glue from affecting the transparency of the parts?
Cheers,
Pete.
LikeLiked by 1 person
With the large parts it is easy: very limited amount of glue. I am not yet sure about the small hooks on the turret and whatnot; perhaps white glue. (Or even more careful application of plastic glue.)
LikeLiked by 1 person